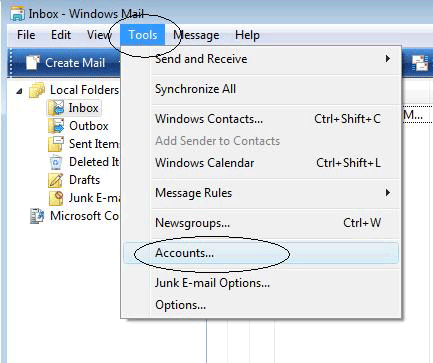
1. Click Tools + Accounts from the menu.
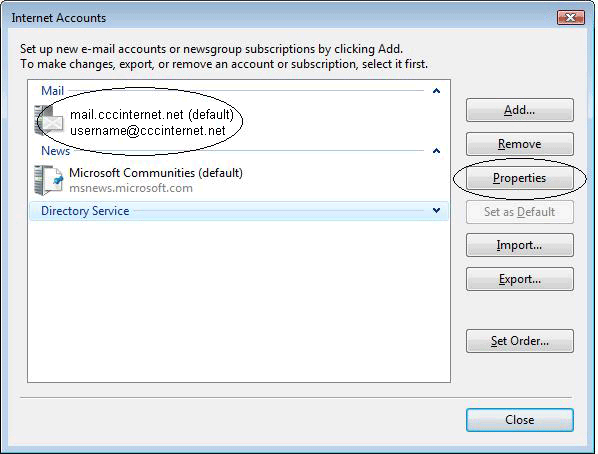
2. The Accounts window will appear. Click on the mail account, then click the Properties button along the right.
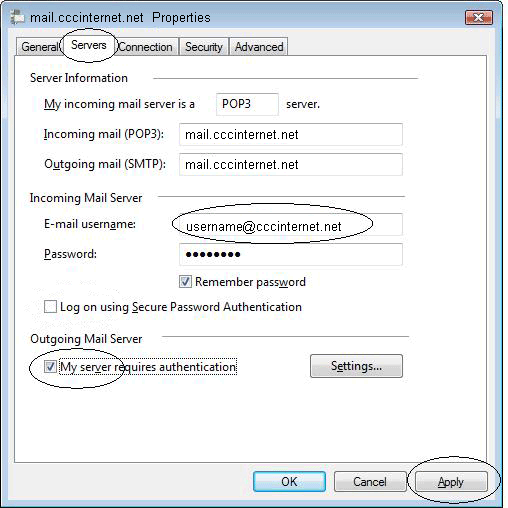
3. The Properties window will appear with five tabs across the top. Click on the Servers tab. Make the following changes as shown in the screenshot below:
- In the Account Name field, enter your complete e-mail-address. Make sure it's all lowercase letters with no spaces within the e-mail-address.
- Check the box for 'Log on using Secure Password Authentication'.
- Check the box for 'My server required authentication'.
- Click Apply.
4. Click on the Advanced tab across the top. Make the following changes as shown in the screenshot below:
- Outgoing Mail (SMTP): Change to 465.
- Check the box for 'This server requires a secure connection (SSL)'
- Incoming Mail (POP3): Changed to 995.
- Check the box for 'This server requires a secure connection (SSL)'
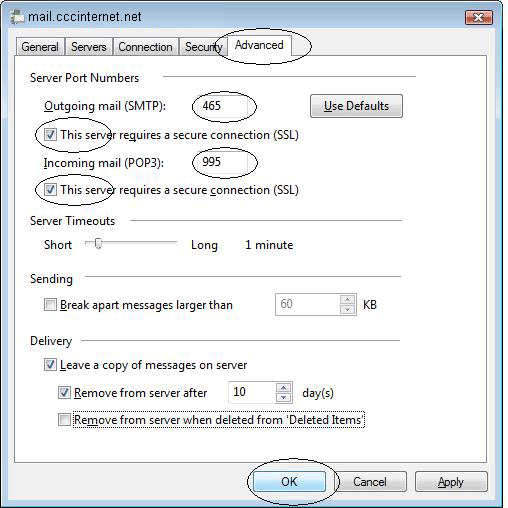
5. Click Apply and OK at the bottom of the window.
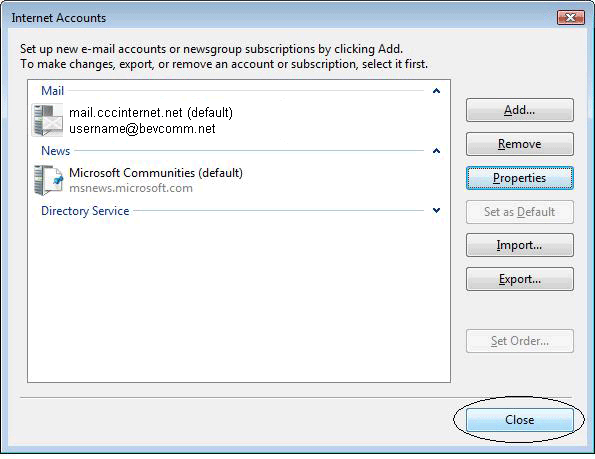
6. Click Close to close the Internet Accounts window. Changes are COMPLETED!